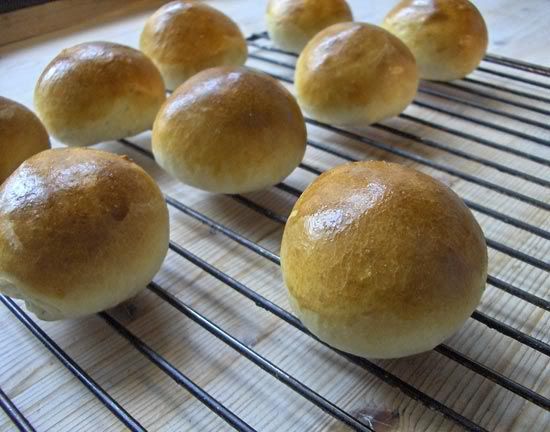
No, we're not celebrating the birthday of the roll, but with the roll. Big difference - I'm not crazy you know. Talking to my oven fresh cuties here is not my thang, even though they do have a lot of personality if I may say so. But if I were to talk to them, I'm sure they would say something in the line of "Thanks a lot b****! How would you like it if you had to spend 12 freaking minutes in a scorching hell hole?" Well, maybe that's why I don't talk to them. Anyway, this kind of roll is what most children have on their birthdays in Denmark, topped with melting butter and coupled with hot chocolate and whipped cream. And that's just the starter. The main course is a great sponge cake with icing and more whipped cream. If the parents are really naughty (or have a death wish) they OD the children with candy after that and whooptedo: 20 hyperactive kids with tummy aches.
Aaaanyway, these rolls are really yummy on their first day, so make sure you have plenty of them, while they're still velvety, warm and can serve as the perfect vehicle for softly yielding butter. And speaking of birthdays, this dough is also perfect for shaping one big dough-woman or man, baking and decorating it with icing sugar and the candy of your choice. Brings out the child in me every time.
Happy Birthday Rolls (makes about 12 depending on the size)
Recipe adapted from an oldschool cookbook on Bagværk in the "Menu" series from Lademann (1979).
- 3 decilitres of milk (any kind will do)
- 50 grams of fresh yeast
- 75 grams of butter, diced and almost room temperature
- 1 tsp. salt
- 1 tsp. sugar
- 1 tsp. cardamom, powdered (the rolls won't taste like cardamom, but it gives a great taste base)
- 500 grams of regular wheat flour
- 1 egg, beaten together for glazing
1) Heat the milk in a saucepan until it's lukewarm (30-35 degrees Celcius). Then crumble the yeast into it and stir until it has dissolved completely. Add the butter and stir until it has melted. Add salt, sugar and cardamom, stir for a while and then add the flour bit by bit. Knead the dough until it has a soft, even and stretchy texture. Leave it in a bowl covered with a tea towel for 30 mins or until it has risen to twice its size. Remember to leave it somewhere with room temperature.
2) Take the dough from the bowl and knead the air our of it. If you're kind of nazi about having evenly sized rolls as I am, you can weigh the dough and divide the grams by the amount of rolls you wish to end up with. Then pull out lumps of dough and check that each of them has the chosen weight.
3) When you're through with dividing and weighing it's time to shape the rolls. I like to start kneading each lump and then, to create the nice even round shape, I take the dough and pull at the outer sides and shove them towards the bottom and into the center of the roll. I hope that makes sense to you, because I can't seem to find a better way of explaining it. If you do it right, you should be stretching the outer sides smooth and tucking in the "ends" into the bottom centre.
4) Put each roll on a lined baking tray and leave them to raise for another 15 mins. under a tea towel. Turn the oven to 220 degrees Celcius while you are waiting.
5) Brush the surface of the risen rolls with a lightly beaten egg and put them in the middle of the oven for about 12 mins. Make sure they don't turn too dark so look at them every now and then. Leave them to cool for 5-10 mins. and serve while they're still a bit warm so the butter will melt softly into the bread. Yummmm!


No comments:
Post a Comment